
When it comes to fingerprint locks, installation is a crucial step that directly impacts your later user experience and the lifespan of the lock. Sometimes, lingering installation issues can directly result in the paralysis of the entire lock system.
For instance, if the position of the square hole is not spacious enough, you may encounter stiffness when turning the door handle. Similarly, inadequate placement of the fixing screw holes may cause misalignment of the front and back panels, resulting in difficulty in door operation, or in severe cases, the door may not open at all.
Installation, seemingly a simple step of inserting the lock body into the door and attaching the front and back panels, is often complicated by hidden quirks.
1. Hole Alignment
Hole alignment is a crucial aspect of lock installation, yet it is often overlooked. Improper hole alignment can lead to common problems that affect the functionality of the smart lock.
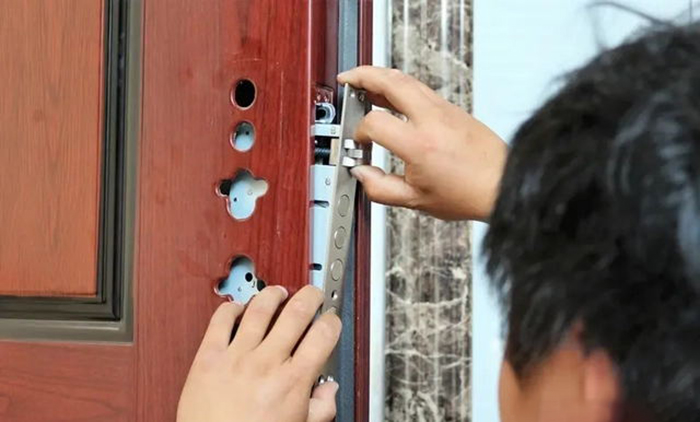
The image above depicts a standard post-2016 door lock hole configuration, compatible with both traditional mechanical locks and modern fingerprint locks. With industry maturation, everything tends towards standardization, including installation hole positions. Almost all manufacturers’ fingerprint lock installation hole positions tend to conform to a similar standard.

The image shows the standard installation bolt configuration for fingerprint locks. There are two connecting bolts above and below for securing the front and back panels, and two positioning screw columns in the middle to prevent panel sagging. If the panel sags, it can obstruct the square hole, resulting in difficulty in door operation.
During installation, it’s crucial to ensure that both positioning columns are correctly installed. Since the holes for the positioning columns are not present in older doors, they need to be drilled. Some installers might take shortcuts and skip drilling the holes for the installation bolts, thus removing these columns. Pay attention to this detail.
During installation, any gap around screws or square steel rods passing through the door must not be less than 5mm. If the panel sags, it will likely contact the door edge, causing jamming or difficulty in use. Unlike mechanical locks, fingerprint locks require an additional wire passing through the door besides the positioning columns, which is used to power the front and back locks. Since the holes in old locks’ doors are usually only the size of a screw, it’s essential to enlarge them.
Also, during wire arrangement, ensure that the wire head is not too close to the moving parts. Long-term contact may lead to loosening or detachment. This issue typically arises during retrofitting old doors, not a concern for new doors, as their hole positions are generally compatible with fingerprint lock wiring holes.
2. Door Thickness
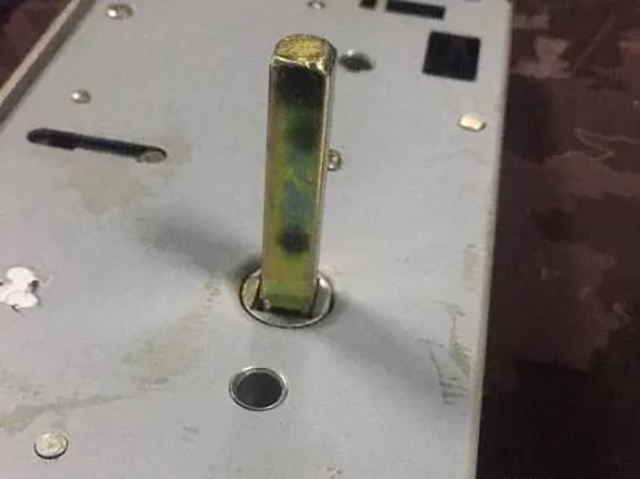
Door thickness corresponds to the size of the installation kit. The handle operates the lock body through a square steel rod to open the door. If the steel rod detaches from the handle, the door may become difficult to open, requiring forceful entry.
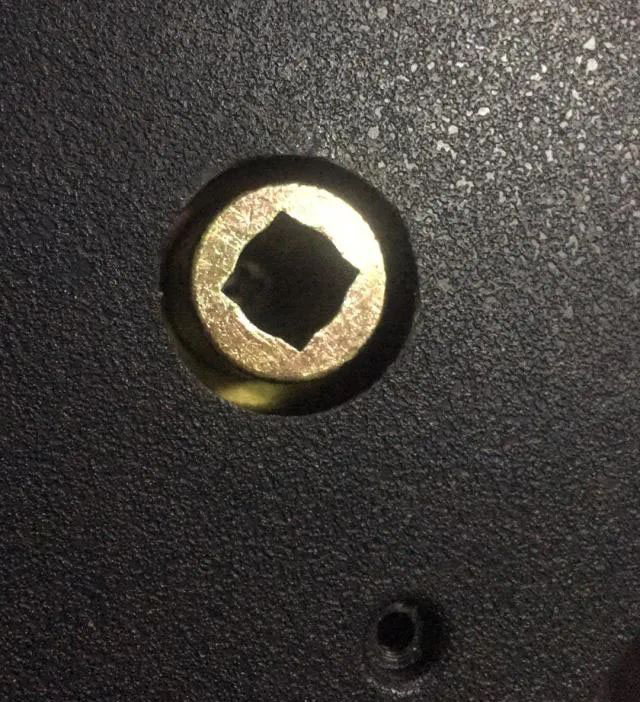
Every fingerprint lock handle has a component with a square hole (see image above), commonly known as a rotation sleeve in the industry. Its purpose is to allow the handle to drive the square steel rod to rotate the lock body and open the door.
The depth of the rotation sleeve’s square hole may vary among manufacturers, but they all include a spring inside to ensure the square steel rod can penetrate the lock body as much as possible.
If the steel rod is at the critical point, initially, it may function correctly. However, over time and with wear on the components, it may become impossible to open the door.
If the above phenomenon is not clear, remember this: the size of the installation kit must completely match the door’s thickness. An observation point is whether, after installing the lock body, inserting the steel rod into the lock body fully leaves at least 1 centimeter of the rod protruding from the door’s exterior. Failure to meet this criterion may result in the door being unable to open.
3. Lock Body
Do not arbitrarily use lock bodies of different sizes from previous mechanical locks, as it can cause four problems:
1. Lock body misalignment, preventing proper centering.
2. Inability to engage the top and bottom hooks, affecting their functionality (removing them resolves the issue).
3. Increased gap between the door and frame.
4. Lock body jamming, preventing it from returning to its position.
Let’s briefly discuss the four types of failures and the situations that lead to them.
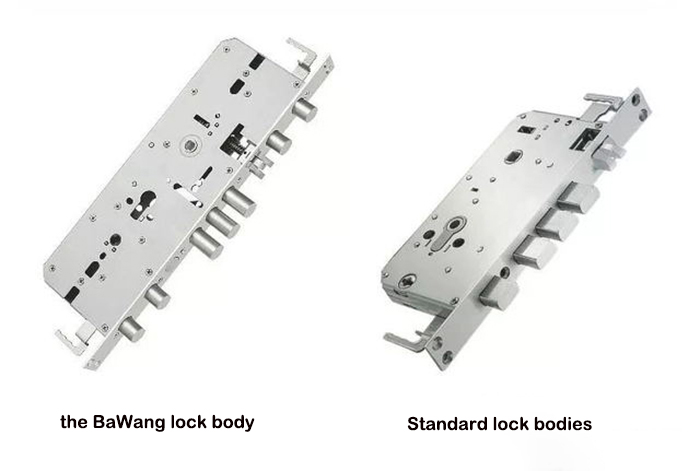
① Lock body misalignment: Lock bodies on the market come in various thicknesses, with 17mm being the thinnest and 27mm the thickest. Doors typically have metal brackets to secure the lock body position. If the previous lock body was 27mm thick and replaced with a standard 17mm lock body, there would be a 1cm difference, within the 5mm tolerance for single-side floating, enough to jam the square steel rod. The sizes of the two lock bodies in the image below are the same, but their thicknesses differ.
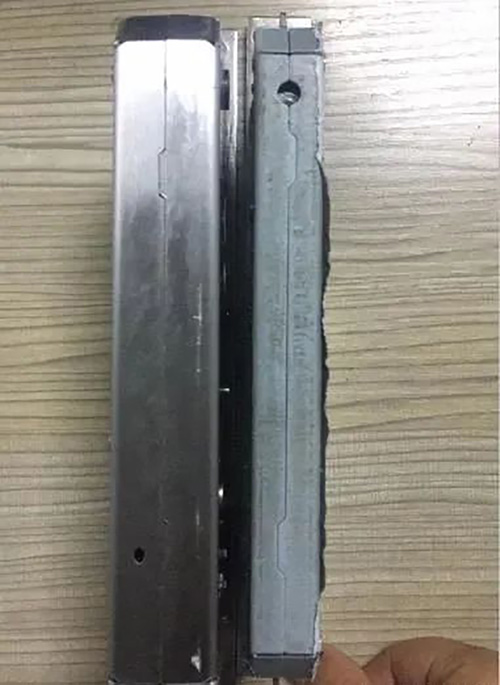
② Inability to engage the top and bottom hooks: This problem often occurs when replacing lock bodies with smaller ones. While the hole distances may differ slightly, they can usually be modified for compatibility. However, the sizes of the top and bottom hooks are entirely different. Attempting to force installation can prevent the hooks from functioning correctly or even cause them to jam. If insisting on installation, it’s recommended to remove the hooks. The image below clearly shows the differing lengths of the top and bottom hooks.
③ Increased gap between the door and frame: This issue arises due to the thickness of the lock bolt. Lock bolts come in various thicknesses, with cylinder lock bolts having an 18mm diameter and typical square bolt lock bodies having a width of 12mm. Installing a 12mm lock bolt on a door designed for an 18mm bolt can create a gap between the bolt and the door strike plate, resulting in the door rattling in the wind.

④ Lock body jamming: Two reasons can cause this: 1. Lock body malfunction, 2. Top and bottom hooks being stuck or fixed.
The most common cause is installing stainless steel lock bodies on wooden doors. When cutting the lock body slot in a wooden door, it’s usually precisely sized to accommodate the corresponding lock body. However, after locking the door, if the top and bottom hooks spread apart, they can directly insert into the door, preventing the lock body from returning, and immobilizing the door. Wooden doors have lock bodies designed specifically for them, without top and bottom hooks. Usually, professional installers won’t make this mistake unless they have a grudge against you. This is a reminder for DIY-savvy consumers always to pay attention, especially with wooden doors.
These three points are the most critical when installing fingerprint locks. By paying attention to them, installing a fingerprint lock should be relatively trouble-free. Although most consumers opt for professional installers, having some basic knowledge is advantageous. Don’t let installers do as they please; having some understanding will never hurt.
Installation is especially crucial for fully automatic locks, as all operations are motor-driven, with constant force. Unlike semi-automatic locks, where opening force depends on user strength, any slight stiffness can trigger abnormal motor operation in fully automatic locks, preventing door opening.
Post time: Feb-21-2024


